Tuesday, 14 April 2015

Papier Mache Easter eggs

Easter eggs are fabulous - everyone knows that.Sadly, like most things that are delicious and make you happy, they are bad for you. At the moment, I would rather be sad and average than happy and fat, but temptation is everywhere. To compensate for my depression I turned to decorating, because crafting makes me almost as happy as chocolate (no, not really, but it's quite a close second) I decided to make something big, pointless and cheerful. Thus, the giant eggs were born.


I started by papier macheing a balloon, using a newspaper strips soaked in a paste made of flour and water. To make the paste you just mix flour with water until you get to the consistency of yoghurt, and it stops being lumpy.

Tear up the newspaper into strips, and then dump them all into the bowl of paste. You should probably use a bigger bow - I switched to a huge one directly after an unfortunate incident with my carpet and the paste.

Leave them to soak while you wrestle your balloon into some sort of semblance of an egg, and try to get it to stand upright.


Take the strips of newspaper, and begin to smooth them onto the balloon. 
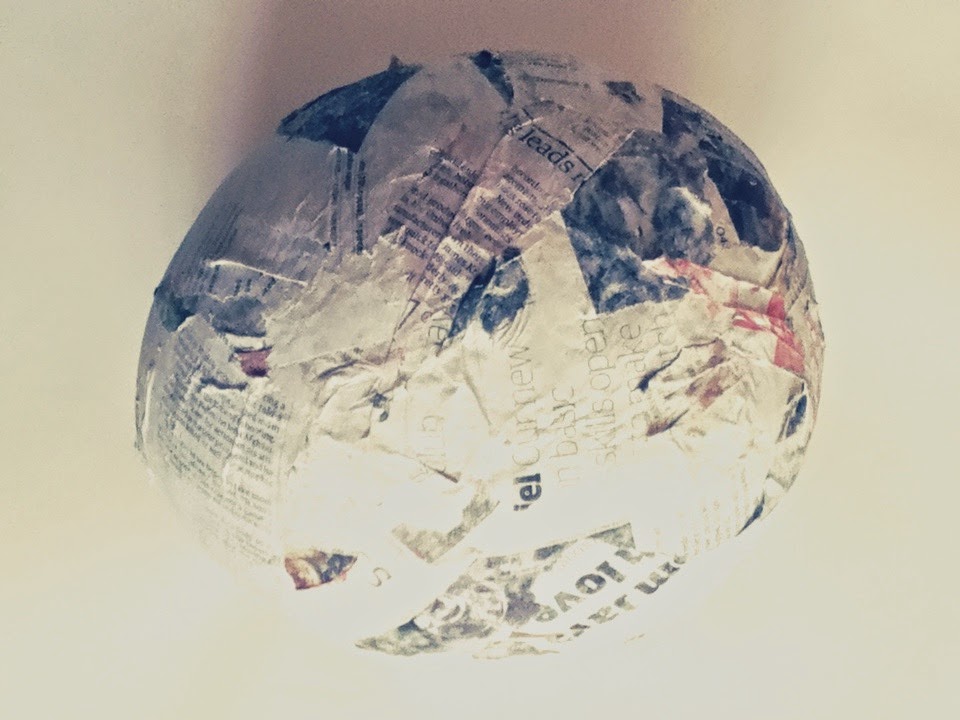

When the entire balloon is covered, leave it to dry overnight. Make sure it's somewhere warm, or the balloon will slowly deflate, and go as soggy and wrinkly as your crushed hopes and dreams. When it's dry you can add another layer to make it stronger if you like. I didn't for the smaller ones because I couldn't be bothered didn't think it was necessary


Now, not that I'm encouraging branding or any of that stuff, but there are certain things that can't be replaced with Tesco own brand. Hellmans mayonnaise is one of them, but for chocolate there are many. I made the giant creme egg by using tissue paper for the purple and red, and yellow paper for the (you guessed it) yellow bit.


For you non branders out there, you could just paint them pretty colours if you fancy to. Like me.


This one is meant to be a mini egg, but I don't really know what went wrong here. Basically, I hate water colours of any description. Or they hate me.


By the way, vinegar does  work to get paint stains out of your carpet, but only if you dilute it, other wise it presents a whole new carpet cleaning adventure. Just saying, in case you make a mistake during this project. Because mistakes can be fixed, and it really isn't the end of the world.


(My parents were not happy at the state of my carpet. I can condense the lecture into 'you didn't pay for the carpet, we did', if you want to take notes.)


The Kinder egg is, as you might have already noticed, fairly personal to me, that being my surname and all. (Kinder, not egg. That would just be silly.) This one was just painted, but I'm afraid that someone stepped on it or something while I wasn't watching, so the back is slightly less 3D than it once was. Ah well, it fits nicely on my desk, and looks very good until you pick it up.


I should probably have ignored my own advice (I usually do) and done two layers, but never mind.


Although my mother is getting slightly anxious at the prospect of having to help me manoeuvre these into the attic once the Easter season is up (and it's only up when summer arrives, in case you're wondering), I was very pleased with these over all. They give me a little spark of joy in the corner of my heart previously reserved for sweet things, which, after all, was their main intention. Not to give mum an aneurysm.
Until next time
x

Sunday, 12 April 2015

My Easter Decorations in All Their Glory

As you know, I've gone somewhat Easter mad this year. I've done everything Easter related that you can possibly fit into a two week holiday, which, of course, includes decorations. This post basically sums up all the decorations that I ended up with (and they're all still up - it's Easter so the 'it's bad luck if you don't take them down' thing that my mum goes on about doesn't count, right? (If it does, and I fall and break my back or something I'll warn you before I die, I swear.)) 
The biggest statement decoration is a pretty close call, because my decorations aren't exactly subtle - where would the fun in that be? My favourite is my big poofy window decoration pom poms :
They honestly do cheer me up every time I walk into the room (which is often), and just because they mean I can't close the curtains or shut my blinds doesn't mean that I have to take them down once Easter is over. I can face a few sleepless nights, knowing that even while I sleep I am resisting the passage of time, and refusing to be dragged any further into the future.


My second favourite is my papier mache Easter eggs, which are also coincidently my mums least favourite. She says that they are pointless, because they are only going to be around for two weeks, I ruined my carpet to make them and they're going to get eaten by rats anyway if I try storing them in the attic. I said that of course they're pointless -they're eggs! (HAHAHAHAAA! Sorry...)


This one is a tad dented - you have to lean it up against the side of my desk, but I love it all the same, because it is our imperfections that make us perfect (my bestie made this one, so that's the excuse she came up with. I'm not convinces, partly because it makes absolutely no grammatical sense.)


This egg is meant to be a mini egg, and if you sort of squint it looks pretty similar. (Don't crush my dreams.)


These are the classiest of my decorations, and supremely easy to make. (Don't tell my mum that though - she was delighted with the flower I gave her.)
http://aminorityofonelunacy.blogspot.co.uk/2015/04/gorgeous-paper-flowers.html


This one doesn't look all that Eastery, but it fits very nicely on my bookshelf, so I'm going to pretend that it's seasonal, if only to stay the many questions on why I have a big orange tissue paper flower on my shelf. If I say it's for my blog people ake interested noises, and move on. (Really it's because I love the colour orange, but don't tell.)

Happy Easter, and as ever, I'd love to see any photos you guys have of your decorations or DIY's - let me know if you tried any of my fabulous ideas. Mwa mwa darlings, 
Until next time x


Wednesday, 8 April 2015

The exotic Isle of Wight

This easter we went to the notoriously luxurious and exotic Isle of Wight, full of gorgeous people, hot sun and azure seas. I wish. It is, however, packed with nice little days out, and lots of places to eat. Not exciting exactly, but nice. I'll post a little more about the specifics if you like, but for now here's a list of the things me and my family did, to either inspire or warn you.

Osborne house

We packed a lot in, and completely got our moneys worth (especially as it was a relatively cheap mini holiday). The ferry there was a bit iffy, and pretty darn small, but it wasn't rough or anything, and it was only a 20 minute ride. It was almost completely empty, mostly because we were on it at the ungodly hour of half past five. In the morning. Am. Before breakfast. I have no idea who decided that this would be a good idea, but anyway.

On the first day we managed to find a kind of smeggy little cafe that opened pretty early. It wasn't bad really, although because I'm stuck up I felt it could do with a little more class, if you know what I mean. I think it was the sheer quantity of grease that they stuffed into a small plate under various different guises that I objected to the most. It was fun though, in a strange way. Later in the day we went to Osbourne house, which used to be the home of queen Victoria, and is (understandably, as she was the queen, and Britain was rich) huge. I felt pretty proud of myself afterwards, like I'd just done a full two hours of classwork, plus a long walk. Talking of long walks though, the one we did the next day made a wander through a Osbone pale in comparison.

And the walk stretched on.
We walked, get this, eight miles! Yes, eight! *unimpressed silence falls* . Well, it might not seem all that impressive to you walking types, but for me and my little unfit legs I may as well have walked to the moon and back, rather than to a National Trust property that is basically the vague trailing off of the Isle of Wight.
The Needles
Surprisingly, the family got on quite well together, even with prolonged contact and forced interaction. I even managed to bully them all into going to a place that was in the book I was reading at the time, and there were no major arguments, and it didn't take all that long for my siblings to stop giving me cold glares and pointed silences. The place I wanted to go was the Devils Chimney, and to be fair to me it was actually pretty amazing. It was two sheer walls of rock, stretching up from a path where the steps were at a diagonal because the entire thing was practically slipping into the sea. Thankfully, it held up while we were there, although the enormously fat dog being carried by the grumpy woman we met before going back up again may have dislodged the cliff face by now.
The Devil's Chimney

In short, we had a brilliant time. I don't know if the Isle of Wight has recovered yet from my dad making impressions of the man with loud laugh in our restaurant (while the man was still on the table next to us... He seemed to leave pretty quickly after they finished eating), or from the transportation of most of their interesting rocks back to England (courtesy of my sister). Oh well, They've got a whole year before we come back.

Thursday, 2 April 2015

Gorgeous Paper Flowers


These were partly an accident. They weren't an accident as in, oops I just cut up a magazine according to a template, but as in I meant to make some slightly corny, very cheerful easter decorations, and I ended up with these. That's not a bad thing, it's just that these are a bit more subtle and classy than I was expecting. If you like that sort of thing, then these are perfect for you.


All you need is some rubbishy fashion magazine (or sport one, neither are worth all that much to me) with loads of adverts or pictures in (except maybe not ones with pictures because they're much better than anything else.) , some scissors, wire, the template and a glue gun, or some strong glue. Glue guns are preferable, because they are perfect in every way; if I was a politician glue guns would be mandatory. The template is here, and sadly it isn't mine, although you can pretend it is, if you like. Take your templates, and cut about three of every type of flower and random circle. Just cut it all out, fill your room with slightly annoying bits of paper that you'll find everywhere for days, go crazy.

When you've done that, organise them into little piles of about three. The only real rule is that you should really go from largest to smallest, although you don't have to. As always, it's a free country.If you're wondering if the circles are meant to have odd slits in them, they are. They're going to turn into cones in just a second.

Glue them all together, with the, wait for it, cones (told you so) in the middle, if that's how you want it.

Aren't they just beautiful? I'm so proud of my little flower darlings. (they worked. yaaaaaaaaaaaass.)
Take a piece of wire and bend it in half, and twiiiist it, before sticking it on as some kind of weird stem thingy.

Just step back and marvel at the wonderful thing that you've created in silent wonder, or shout out to every one you know, showing them how great you really are. Because you deserve it. Power to the people (or something.)


Sunday, 29 March 2015

Easter Paper Pom poms

There have been both successes and failures in my easter decorating extravagant. My easter balloon egg sting things have so far been a failure, which is disappointing, but I'm working on it. The success came from some nice subtle paper decorations I made.

Haha, jokes they're not subtle!! Where'd the fun in that be?
To make them you need : tissue paper, wire, scissors and some thread to hang it up. 
First, take your tissue paper and fold it in half, or quarters if you want a smaller pom pom. I made varied sizes, but there's no exact science to it.

Next, concertina it until you have folded it the whole way. (By concertinaing it, I mean folding it like a fan.)

Take your wire and wrap it tightly around your paper strip. However tightly you've wrapped it, probably give it one more twist, just to make certain. Come on now, don't be lazy.


Now clip the ends with your scissors. This should be pretty exciting, because it's decision time! You can either make your ends pointy or curved - it's up to you! *yay* 

Now just sort of do this. (I can't really describe it, but basically spread your little wigs and fly away. Wait, not really, don't go)
Fluff up all the layers, trying to make it even because we don't want to make it, you know, messy or anything.
                                      
                                      
Make a whole bunch more, to make it look all arty farty, because my room so didn't have enough stuff it all ready. Add string to hang it up with, and Bob's your metaphorical uncle (I say metaphorical because I am unfortunately not lucky enough to have an uncle named Bob, so I don't know why I used that expression really.)
Isn't it pretty? And festive? It makes me happy, which is the most important thing (even if they do mean that I can't close my curtains. Oh well, it's a small price to pay.)


Friday, 27 March 2015

How to draw Magnus Bane, from the Mortal Instruments


Obviously, I'm a massive fan girl. I obsess over a lot of things, and I have a lot of people I love. On a list from one to five it would probably go: Sherlock, Benedict Cumberbatch, Matt Smith, Magnus and Skullduggery Pleasant. Oh, and my family. Maybe. Anyway, today I fancied some glitter and high cheekbones, so here is how to draw the one, the only...
Wizardry


Begin with just a circle. Everything has to start some where, like a little acorn.
 Add a rectangle with the point touching the halfway line to your little acorn.
Begin shaping in his cheeckbones, cheeks and chin, as well as his jawline, using the rectangle as a guide.
 Add in some guide lines across the circle, being careful with the outlines.
 Draw the eyes, nose and mouth, on the guide lines. I had loads of trouble with the mouth, and had to tipex it out several times. With someone elses tipex. (I'm so professional)
 Pencil in the eye brows (for real.), using tiny little lines.
 Do some adjustments (I don't really know what I changed here, but just do it anyway.)
 Give him a shirt. It's cold out there.
 Add his luxurious locks, probably a bit thicker than me.
 Outline it all in pen, and do some contouring, providing that is what you call it on drawn characters. Look, your acorn is blooming (?) into an oak tree already! Aren't you proud?
 Do your final adjustments, rub out all the bad bits, and just generally make it a ton better.


Et voila! A beautiful warlock, to consume with your eyeballs as you please. As you can tell, I made this all up myself, so please excuse the rubbishy photos. Good luck!