Showing posts with label DIY's. Show all posts

Wednesday, 3 June 2015

Ruffly flowers

Now, it's summer outside. Y'know, summer, sun, lack of rain, heat. Someone might want to tell whoever's in charge of the weather that though, because Britain has yet to see a hint of the glorious thing some call sunshine. There's barely been enough for the flowers, let alone enough for me to get any sort of tan. But! I, for one, am not giving in to the dismalness (is that a word?) outside. It can pee down out there all it likes, I'm making paper flowers inside. Because I'm cool.

You'll need:
Tissue paper
A stapler
Scissors
Green card
(that's it)


Cut your tissue paper into squares. You'll need around four or five of these.


Fold all of these in half, triangularly.


Cut little pretty scallops into the long, unfolded edge.


Unfold the tissue paper.


Staple the center of the cross.


Unfold all of the paper, and smush (getting technical here.) the paper into a flower shape.


Roll a piece of green card into a stem, and attach it.


Tadah!! Beautiful!!


I'm going to try and sort out some sort of schedule with regards to this blog, but hopefully there'll be a couple of guest posts soon! Fingers crossed!
Until next time
x
Ps. By the way, if you come here often, please follow le blog (see how French I am?). It means a lot to me. Love you guys! xxx

Friday, 1 May 2015

Earrings in a Bottle


Now, this probably makes me look extremely stingy, because out of my two friends who've had birthdays in the last two weeks, how many presents do you think I bought? HAHAH NONE!! I spent no money, only my own sweet time, and still they didn't get offended and (I don't think) vow to never talk to me ever again. This one was for my friend Lucy, and the picture is pretty shoddy, so you cant really see what it is. Again, I'm not classing this as a tutorial, on account of the fact that I hate it when people say that there's an easy tutorial and then they're all like, oh, just get your butterfly leatherette and some 24 carat gold, then blend it with almond flax meal Scandinavian sugar meat, and then add some of your soul and your first born child and add some washi tape and you're done! In this case, I used some wire, some blank stud earrings I got from Tiger (which is the best shop that there is, by the way), two random blue stones I had from somewhere, and a teeny weeny bottle.

In case you hadn't guesses, I made earrings in a bottle, and a kind of wire tree to support them in. I literally just glued the stones on with super glue, so I don't know if they'll fall apart, but they will probably;y be held together with my prayers, like most things I make. Whether or not Lucy will ever wear the earrings, or indeed be able to get them out of the bottle remains to be seen, but she seemed happy, and I stayed up late enough to make them that they county as thoughtful. I would have liked them, so it was probably fine.
Until next time
x

Oh, by the way, do you like the new font? Let me know x

Wednesday, 29 April 2015

DIY Beautiful Nail Polish Daisy Bracelet Present


I don't know about you, but I'm not made of money. (No, my skin isn't paper, but that's not what I meant) However, I've learnt the basics of this thing that you humans call 'friendship', and it involves being nice to the people who you wish to be friends with.  This includes caring about birthdays, hence presents, hence the moaning at the beginning of this waffling. I didn't call this a tutorial, because I didn't manage to take pictures at every stage, but I'll explain how I made this bracelet for my friend Megan. It looks really pretty (in my humble opinion) and can be made with things you probably have around the house anyway. By the way, I'm sorry I haven't posted in a while, but I've had exams, which were *fun*. I should be revising for my last one now really, but I'm going to sleep on my  book instead, to see if history knowledge just seeps into my brain. I'm sure I'll do fine.


You'll need:
Nail polish
Jewellery wire, or some other thinnish wire
Um.
That's it.
Oh, you should probably invest in some patience too


The first thing you have to do is make a bunch of teeny little wire flowers, with about 5 or six petals each. You can make the petals even by wrapping the wire round a pencil, and make sure you leave pretty long 'stems'. Next, fill in the petals with nail polish. This honestly does work, by some sort of voodoo magic, and the picture below is from a tutorial on : http://www.goodshomedesign.com/diy-spring-flower-wire-nail-polish/
                                       
                                         DIY-Spring-Flower

You probably need about 12 of these little daisies. When you've made them, and they're dry, you can start to make little hoops at the end of them, and then start hooking them together. This is the best part - it feels like primary school all over again, because you literally loop them together like a daisy chain. (If you don't know how to do this then get outside right now and make you some daisy chains. This is a part of childhood, and if you're no longer a child then you're going to have to start now instead to make up for lost time)


.
Keep going until you've got a chain that will easily fit round your wrist, and then you finish it off, just like a daisy chain.


If you're fancy, and you've got clasps, then you could use those like a proper jewellery person, but if not (like me, sadly), then just make a loop out of the last daisy's stem, which is big enough to fit the first daisy's head through.

                                     
One you've done that you can dab clear nail polish or glue on the backs of all the bits where the daisies connect, or not if you'd rather it falls apart.


Megan really liked the bracelet (or at least, she seemed like she did. She does take drama though... Nah, I like to think it was all real.), so it was extremely successful, and something I wish I didn't have to give away.


Let me know if you had ago, and I'll be back soon. Next time I'll write there'll be no more exams for a whole year *silent partying* (my parents are looking at me a bit weirdly, but they don't even bother questioning my oddness any more. AI don't know whether to be offended or not)
Until next time
x

Tuesday, 14 April 2015

Papier Mache Easter eggs

Easter eggs are fabulous - everyone knows that.Sadly, like most things that are delicious and make you happy, they are bad for you. At the moment, I would rather be sad and average than happy and fat, but temptation is everywhere. To compensate for my depression I turned to decorating, because crafting makes me almost as happy as chocolate (no, not really, but it's quite a close second) I decided to make something big, pointless and cheerful. Thus, the giant eggs were born.


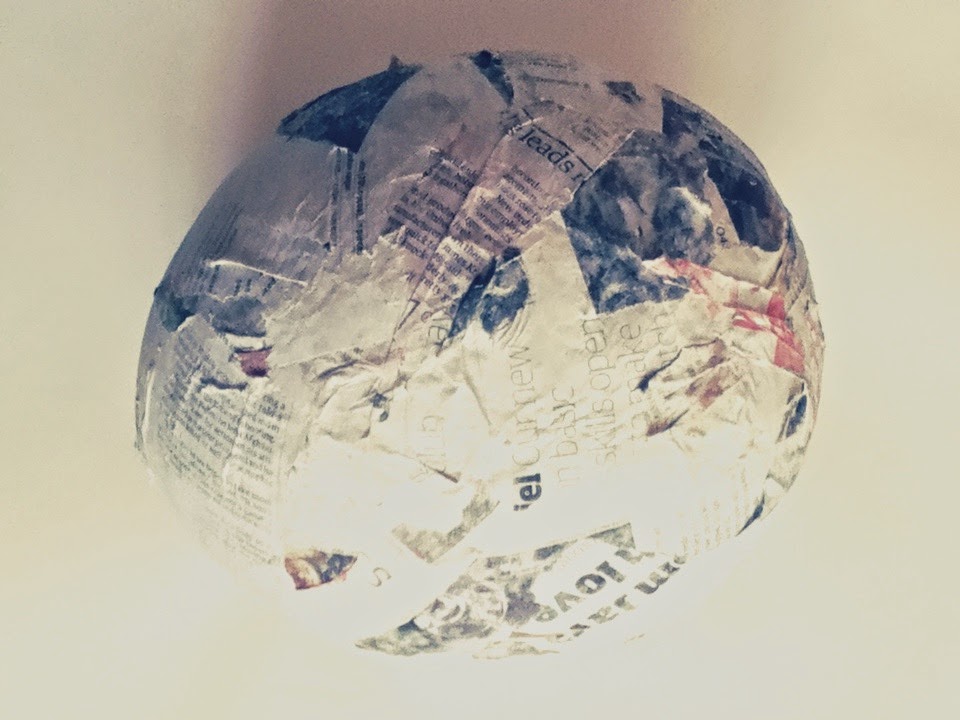
I started by papier macheing a balloon, using a newspaper strips soaked in a paste made of flour and water. To make the paste you just mix flour with water until you get to the consistency of yoghurt, and it stops being lumpy.

Tear up the newspaper into strips, and then dump them all into the bowl of paste. You should probably use a bigger bow - I switched to a huge one directly after an unfortunate incident with my carpet and the paste.

Leave them to soak while you wrestle your balloon into some sort of semblance of an egg, and try to get it to stand upright.


Take the strips of newspaper, and begin to smooth them onto the balloon. 


When the entire balloon is covered, leave it to dry overnight. Make sure it's somewhere warm, or the balloon will slowly deflate, and go as soggy and wrinkly as your crushed hopes and dreams. When it's dry you can add another layer to make it stronger if you like. I didn't for the smaller ones because I couldn't be bothered didn't think it was necessary


Now, not that I'm encouraging branding or any of that stuff, but there are certain things that can't be replaced with Tesco own brand. Hellmans mayonnaise is one of them, but for chocolate there are many. I made the giant creme egg by using tissue paper for the purple and red, and yellow paper for the (you guessed it) yellow bit.


For you non branders out there, you could just paint them pretty colours if you fancy to. Like me.


This one is meant to be a mini egg, but I don't really know what went wrong here. Basically, I hate water colours of any description. Or they hate me.


By the way, vinegar does  work to get paint stains out of your carpet, but only if you dilute it, other wise it presents a whole new carpet cleaning adventure. Just saying, in case you make a mistake during this project. Because mistakes can be fixed, and it really isn't the end of the world.


(My parents were not happy at the state of my carpet. I can condense the lecture into 'you didn't pay for the carpet, we did', if you want to take notes.)


The Kinder egg is, as you might have already noticed, fairly personal to me, that being my surname and all. (Kinder, not egg. That would just be silly.) This one was just painted, but I'm afraid that someone stepped on it or something while I wasn't watching, so the back is slightly less 3D than it once was. Ah well, it fits nicely on my desk, and looks very good until you pick it up.


I should probably have ignored my own advice (I usually do) and done two layers, but never mind.


Although my mother is getting slightly anxious at the prospect of having to help me manoeuvre these into the attic once the Easter season is up (and it's only up when summer arrives, in case you're wondering), I was very pleased with these over all. They give me a little spark of joy in the corner of my heart previously reserved for sweet things, which, after all, was their main intention. Not to give mum an aneurysm.
Until next time
x

Sunday, 12 April 2015

My Easter Decorations in All Their Glory

As you know, I've gone somewhat Easter mad this year. I've done everything Easter related that you can possibly fit into a two week holiday, which, of course, includes decorations. This post basically sums up all the decorations that I ended up with (and they're all still up - it's Easter so the 'it's bad luck if you don't take them down' thing that my mum goes on about doesn't count, right? (If it does, and I fall and break my back or something I'll warn you before I die, I swear.)) 
The biggest statement decoration is a pretty close call, because my decorations aren't exactly subtle - where would the fun in that be? My favourite is my big poofy window decoration pom poms :
They honestly do cheer me up every time I walk into the room (which is often), and just because they mean I can't close the curtains or shut my blinds doesn't mean that I have to take them down once Easter is over. I can face a few sleepless nights, knowing that even while I sleep I am resisting the passage of time, and refusing to be dragged any further into the future.


My second favourite is my papier mache Easter eggs, which are also coincidently my mums least favourite. She says that they are pointless, because they are only going to be around for two weeks, I ruined my carpet to make them and they're going to get eaten by rats anyway if I try storing them in the attic. I said that of course they're pointless -they're eggs! (HAHAHAHAAA! Sorry...)


This one is a tad dented - you have to lean it up against the side of my desk, but I love it all the same, because it is our imperfections that make us perfect (my bestie made this one, so that's the excuse she came up with. I'm not convinces, partly because it makes absolutely no grammatical sense.)


This egg is meant to be a mini egg, and if you sort of squint it looks pretty similar. (Don't crush my dreams.)


These are the classiest of my decorations, and supremely easy to make. (Don't tell my mum that though - she was delighted with the flower I gave her.)
http://aminorityofonelunacy.blogspot.co.uk/2015/04/gorgeous-paper-flowers.html


This one doesn't look all that Eastery, but it fits very nicely on my bookshelf, so I'm going to pretend that it's seasonal, if only to stay the many questions on why I have a big orange tissue paper flower on my shelf. If I say it's for my blog people ake interested noises, and move on. (Really it's because I love the colour orange, but don't tell.)

Happy Easter, and as ever, I'd love to see any photos you guys have of your decorations or DIY's - let me know if you tried any of my fabulous ideas. Mwa mwa darlings, 
Until next time x


Thursday, 2 April 2015

Gorgeous Paper Flowers


These were partly an accident. They weren't an accident as in, oops I just cut up a magazine according to a template, but as in I meant to make some slightly corny, very cheerful easter decorations, and I ended up with these. That's not a bad thing, it's just that these are a bit more subtle and classy than I was expecting. If you like that sort of thing, then these are perfect for you.


All you need is some rubbishy fashion magazine (or sport one, neither are worth all that much to me) with loads of adverts or pictures in (except maybe not ones with pictures because they're much better than anything else.) , some scissors, wire, the template and a glue gun, or some strong glue. Glue guns are preferable, because they are perfect in every way; if I was a politician glue guns would be mandatory. The template is here, and sadly it isn't mine, although you can pretend it is, if you like. Take your templates, and cut about three of every type of flower and random circle. Just cut it all out, fill your room with slightly annoying bits of paper that you'll find everywhere for days, go crazy.

When you've done that, organise them into little piles of about three. The only real rule is that you should really go from largest to smallest, although you don't have to. As always, it's a free country.If you're wondering if the circles are meant to have odd slits in them, they are. They're going to turn into cones in just a second.

Glue them all together, with the, wait for it, cones (told you so) in the middle, if that's how you want it.

Aren't they just beautiful? I'm so proud of my little flower darlings. (they worked. yaaaaaaaaaaaass.)
Take a piece of wire and bend it in half, and twiiiist it, before sticking it on as some kind of weird stem thingy.

Just step back and marvel at the wonderful thing that you've created in silent wonder, or shout out to every one you know, showing them how great you really are. Because you deserve it. Power to the people (or something.)


Sunday, 29 March 2015

Easter Paper Pom poms

There have been both successes and failures in my easter decorating extravagant. My easter balloon egg sting things have so far been a failure, which is disappointing, but I'm working on it. The success came from some nice subtle paper decorations I made.

Haha, jokes they're not subtle!! Where'd the fun in that be?
To make them you need : tissue paper, wire, scissors and some thread to hang it up. 
First, take your tissue paper and fold it in half, or quarters if you want a smaller pom pom. I made varied sizes, but there's no exact science to it.

Next, concertina it until you have folded it the whole way. (By concertinaing it, I mean folding it like a fan.)

Take your wire and wrap it tightly around your paper strip. However tightly you've wrapped it, probably give it one more twist, just to make certain. Come on now, don't be lazy.


Now clip the ends with your scissors. This should be pretty exciting, because it's decision time! You can either make your ends pointy or curved - it's up to you! *yay* 

Now just sort of do this. (I can't really describe it, but basically spread your little wigs and fly away. Wait, not really, don't go)
Fluff up all the layers, trying to make it even because we don't want to make it, you know, messy or anything.
                                      
                                      
Make a whole bunch more, to make it look all arty farty, because my room so didn't have enough stuff it all ready. Add string to hang it up with, and Bob's your metaphorical uncle (I say metaphorical because I am unfortunately not lucky enough to have an uncle named Bob, so I don't know why I used that expression really.)
Isn't it pretty? And festive? It makes me happy, which is the most important thing (even if they do mean that I can't close my curtains. Oh well, it's a small price to pay.)